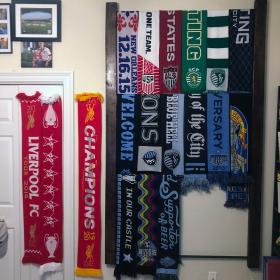
Okay, fine, I’ll do another DIY post, because COVID has me doing more and more of them - like pretty much everyone these days, I guess. I spend way more time in my office at home than I probably should, even before literally everyone started doing the same thing. It is essentially a workspace and I guess almost a “man cave,” though I absolutely loathe that term, insomuch as the office also houses most of my collectibles and dorky things I’ve accumulated over the years.
One of those collections is my batch of soccer scarves, which have been collected over the last decade from various matches I’ve attended, or from significant events with the teams I support, or in one case because I was in an airport in Europe and found one I liked from a team I’ve virtually never watched. Over time, that’s added up quite a bit, and I ended up not being able to display them all with the wall space I had available, leaving some very cool ones rolled up and stored, and taking up space.
Back when I lived in Kansas City, I saw a huge wall of scarves at the Boulevard Member’s Club (now the Budweiser Brew House) at Children’s Mercy Park, home of my MLS team. If you check that link, you’ll see that the wall is huge and lined with what are essentially clothes racks full of folded scarves that can be pulled off and looked at more closely. While I prefer to have my scarves displayed full-length so they don’t need to be pulled down to see fully, the size of my office has now dictated that I don’t have much of a choice, so I realized this would be a good option for me going forward. I did some searching around, and I found ScarfRacks.com, who had some truly lovely-looking frames to do the same job. Unfortunately, as nice as their products look online, they were completely out of stock at the time and cost far more than my budget allowed, so I settled on doing the job myself.
The racks on ScarfRacks appear to have very nice mounting hardware, adjustable rails, and well-finished woodwork. I, naturally, didn’t do any of those things. Here’s my materials list:
-
Two premium Douglas Fir 2x4 studs at 8’, cut down to 7’.
-
Two 10’, 1/2” inside diameter galvanized conduit, cut to four 44” segments.
-
Four large sawtooth picture hangers.
-
Rustoleum Universal spray paint in Metallic Carbon Mist.
-
Varathane Poly+Stain in Espresso.
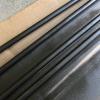 A typical scarf is 7” wide, though there is some variation, so I cut my pipes to 44” segments to leave 42” of visible space plus an inch inside each stud to hold them in place. I then polished them with mineral spirits and painted them in Carbon Mist, to give them more of the look of vintage iron pipes. Of course, with the pipes almost fully covered, this might not be completely necessary, but as you will see in the finished product I have one pipe only half-covered, so it does look nicer this way. You could also consider using PVC pipe for this, but PVC isn’t as rigid over wide spans, so you would likely need to reinforce the pipe somehow, with braces, a dowel rod through the middle of each pipe, or a third stud in the middle, to avoid sagging. If you wanted to make the rack half the width of this one, PVC would probably work fine without reinforcing. You could also make the entire thing out of wood, and use dowels for your bars, but I personally don’t like that look as much and galvanized pipe is far less expensive anyway.
I cut down the studs by a foot apiece to make sure they didn’t take up the entire wall. As things ended up, I probably could and should have left another six inches on them for my application, so I could have showed a little more of each scarf and not hung them exactly in half. The typical scarf is around 56” long, but I managed to make my measurements against an atypical scarf that was only 52” long. So, unfortunately, I set my hanging bars only 26” apart, meaning that the scarves were a little more obscured and in each others’ way than I intended.
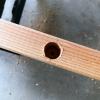
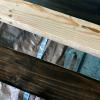 Once the studs were cut, though, I marked out the locations for each rod. I measured both studs at once, with the tops of the studs completely flush, and used a square to mark the lines so that I could be sure each bar would end up level. For this setup, I put the marks at 3”, 29”, 55”, and 81”. I intended to use the top three bars only for hanging, and the bottom bar solely for stability, to keep the scarves all (mostly) within the footprint of the frame. This meant that I had room for 18 scarves on my rack in total.
I then took a 1” spade bit to the middle of each mark to spade out the hole to hold the bar. I wasn’t too scientific about the depth - I just eyeballed the drill to try to get it at about an inch on each hole. Having access to a press would have made this far easier, but drilling it with a hand tool worked just fine.
After the drilling was complete, I sanded each stud multiple times, starting with 120-grit paper and working my way through 240 and 320. I cleaned up both studs with mineral spirits, and then followed with the poly stain, again sanding with 320 and 600 after each of the two coats I put on. A final spirit cleaning after everything was dry, and it was ready for the hardware.
 My original thought for hanging the thing was to do it with cut-in keyhole hangers directly into the studs. I didn’t have the proper tools to do this nicely, though, and in any event I realized that you didn’t want to flush-mount this, because the scarves need a little room to wrap around the bars. Instead, I went with the largest sawtooth hangers I could find on the shelf, placing them behind the top and bottom sets of holes I drilled for the bars and tacking them into place. This assembly isn’t all that heavy, so properly anchored screws plus these sawtooth hangers are more than enough to lock the assembly into place at all four corners. They provide just enough space for the scarves to wrap around and remain almost flush against the wall; standoff hangers with posts would make putting the scarves in place a bit easier if you wanted the look of the rack sticking off the wall a bit.
Getting it on the wall wasn’t difficult at all, having measured everything from the top flush of the two studs. A laser level and tape measure were sufficient to get the mounting screws into the wall in the correct spot and get the studs both mounted; I had enough wiggle room in the studs and the length of the rods to get all four rods in place while removing just one stud and holding it in place while arranging the rods, without help.
So, now I have all my scarves displayed with no more rolled up and out of sight, and I still have three more slots I can fill up, because I kept my three Liverpool FC scarves in pride of place and hung at full-length nearby. Even though I had to grab all the materials new for this project, I still saved between $100-200 over buying a similar solution online, and I got to bang out another fun DIY project to keep me occupied to boot. Below, you can see the full before-and-after!
- Log in to post comments
